Document Details
This section will cover how to manage documents and view document tracking analytics. If you're looking to find out how to insert tracked documents in your emails, check our document tracking guide for the chrome extension.
Managing documents
- Visit the documents page. Here, you will see an overview of all the tracked documents you have sent.

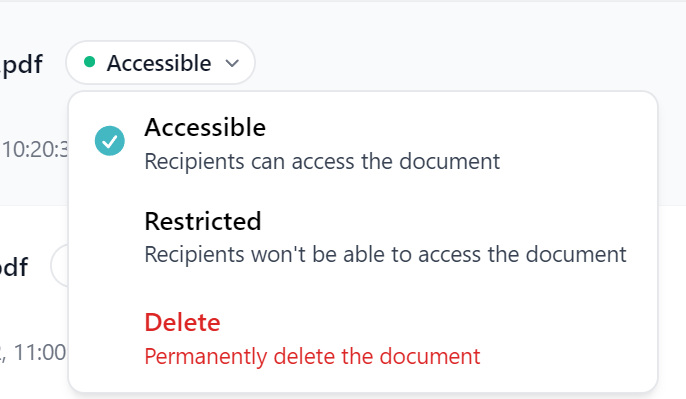
- To open a document, click on its name. Next to the name, you'll see the current status of the document:
- Accessible: Recipients can access the document.
- Restricted: Only you can view the document, provided recipients haven't downloaded it while it was accessible.
- To change the status, click the status bubble and select either accessible or restricted.
- You can also delete the document entirely from the same window. This action will permanently remove the document from your account, making it inaccessible to everyone.
Viewing document tracking analytics
- On the documents page, click on the document row to be redirected to the corresponding mail's tracking page. Alternatively, you can click any mail tracking from within the trackings list.
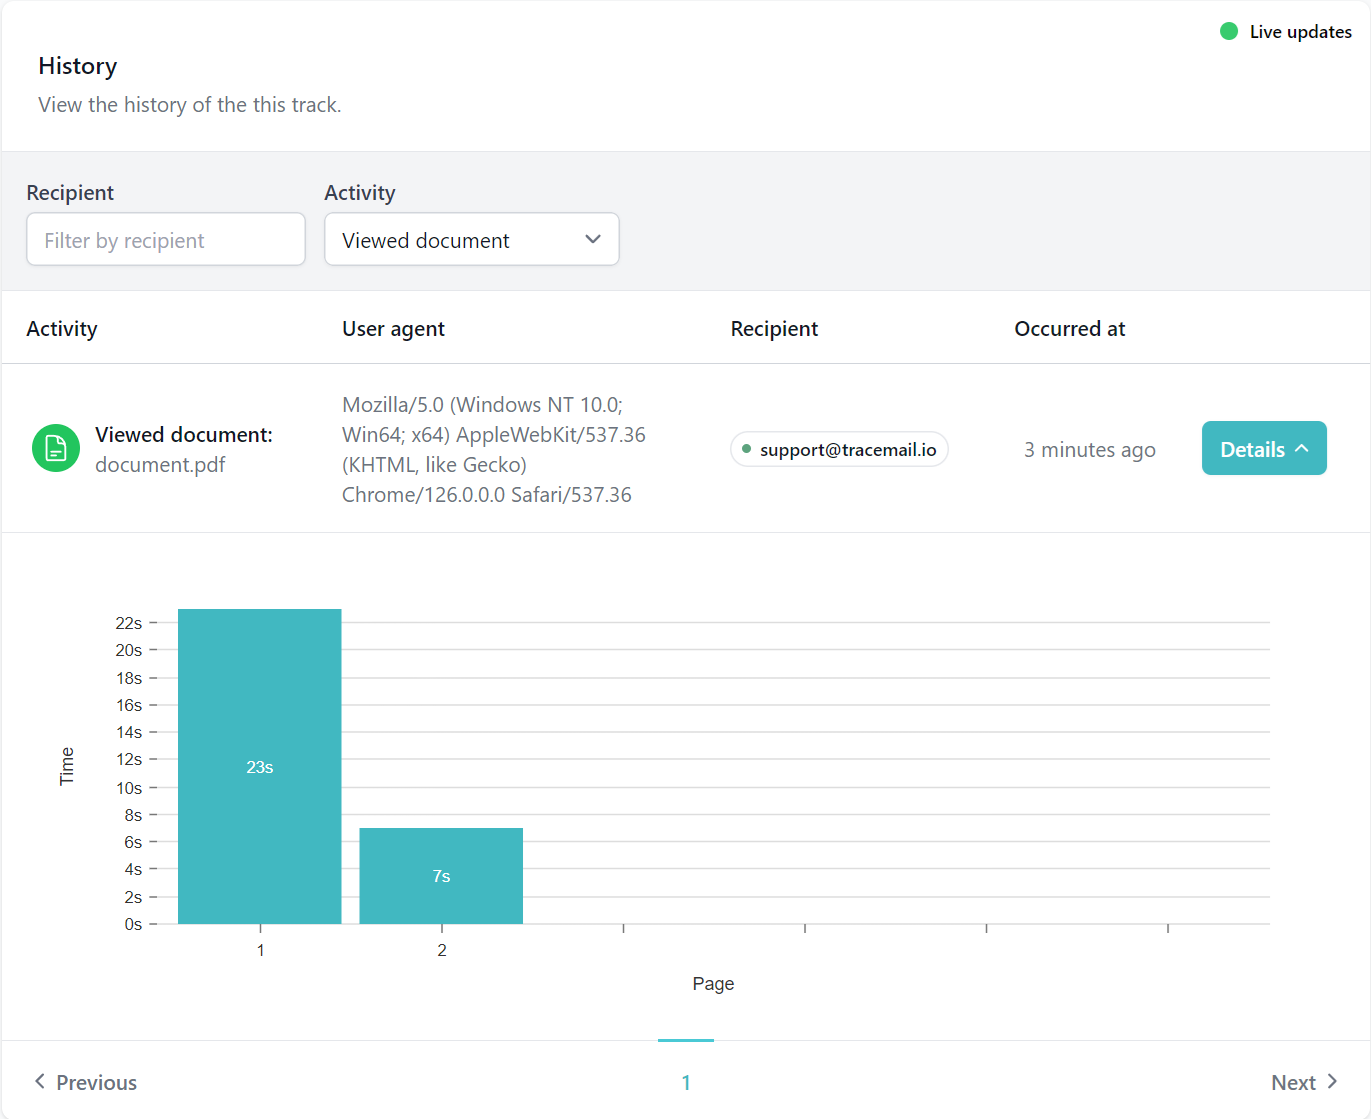
- Here, you can view the entire tracking history for this mail. To filter for tracking activities based on document interaction, use the "Activity" filter dropdown.
Currently, there are three interactions that trigger an activity:
Opened document
This activity is triggered when a recipient first opens a tracked document in your mail.Downloaded document
This activity is triggered when a recipient clicks the download button within the PDF viewer. Note that you can disable the download button when inserting a document into your mail.Viewed document
This activity features a "Details" button that expands a chart with detailed page-by-page analytics. It displays how long each recipient has viewed each document page during that viewing session.